


Level up your NgRx game
Practical examples of NgRx usage backed up with field experience - schematics, selectors, entities, good action hygiene and serialization.


Since you’re here, it’s very likely that you’ve already been using NgRx in your Angular application. In any case, I’d like to give a short introduction of it with quoting from its official website.
@ngrx provides a set of clean, well-tested libraries for reactive programming in Angular applications. — http://ngrx.github.io/

I’ve been using NgRx for building fairly complex applications for one of our enterprise clients since last year.
My journey through NgRx includes building a brand new application with the latest version of NgRx, migrating a stateful Angular application to a reactive one, and also migrating an old NgRx application to the latest version.
I’d like to share my experiences with it so far, by giving some tips and tricks to both existing users and complete beginners of NgRx.
The examples in this article are based on NgRx v6 which uses classes for actions, rather than creators. To see updated version — v8 examples of the best practices on this blog post, you can watch my talk at angularday conference in Verona from May 2019:
Use schematics
If you’re not familiar with what schematics is in Angular world, please take a look at this post first.
NgRx team has introduced @ngrx/schematics with version 5. If you’d like to reduce the boilerplate, you’ll definitely love this. It will also help you to align with non-officially existing style guide.

NgRx team loves complaints on boilerplate. Brandon don’t block me, bro. Seriously.
A good trick on NgRx schematics is to set it as default collection for your Angular application. After installing @ngrx/schematics, execute following to set it as default collection for your Angular application.
ng config cli.defaultCollection @ngrx/schematics
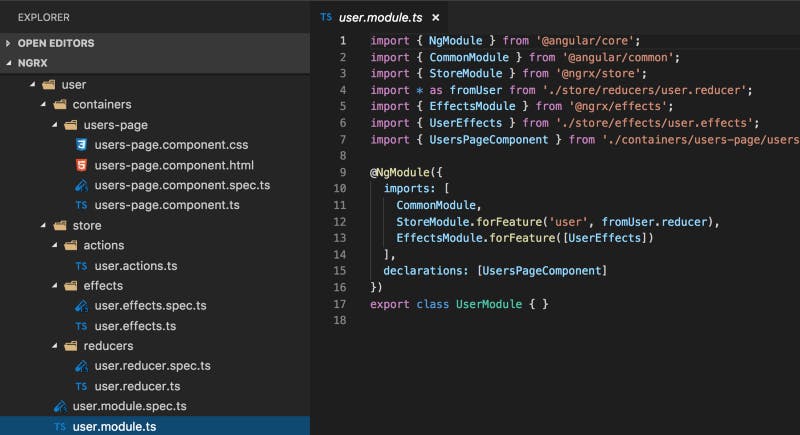
With 3 simple CLI commands, you can generate a boilerplate code for the basis of your new reactive feature, including TestBed configurations. It’s structured exactly as it’s in NgRx example-app.
ng g module user --flat false
ng g feature user/store/user --module ./user/user.module.ts --group
ng g container user/containers/UsersPage
It’s a pretty big deal actually!
Same folder structure as it’s in the example-app — https://github.com/ngrx/platform/tree/master/projects/example-app
You can take a look at the documentation for further usage instructions — https://github.com/ngrx/platform/tree/master/docs/schematics.
Maintain a good action hygiene
Actions are the foundation of an NgRx app. It’s so important that a good action hygiene can help both business development and software engineers at the same time.
Good actions are actions you can read after a year and tell where they are being dispatched. — Mike Ryan
As Mike Ryan states on his Good Action Hygiene with NgRx talk, poor processes lead to poor quality applications. I’d like to stress the common pitfalls from his talk as a reference, hoping that it will help more people avoid them.
Don’t reuse actions
Actions should capture events, not commands.
Try to model your actions as unique events on your system so that you can easily understand where it comes from a year later.
Reducers and effects should be the decision makers
Separate the description of an event and the way it’s handled in your app. Leave the decision making to your reducers and effects, your components should not decide how state changes.
Avoid using generic action types
When you take a look at your code or your store devtools logs, it should be clear for everyone how your application behaves and what’s the origin of an event.
Especially for the development team, pinpointing any of the actions in a big application helps everyone more than you can imagine.
A good formula to accomplish this is using [Source] Event format.

Generic actions vs exclusive actions — An example from Mike’s presentation
Don’t do action subtyping
This pitfall is strongly related to action reusing. Chances are, you won’t fall into this if you avoid the first pitfall. Don’t push it to build generic actions with sub types and be as unique as possible with your actions.

Nested conditional in a reducer — An example from Mike’s presentation
Falling into this pitfall may bring conditional branches all throughout your application. It will be a pain in the neck to maintain them when they add up by your application scales up. Avoid nested conditionals in reducers and effects!
Simplify your reducers with @ngrx/entity
NgRx team works hard on reducing the boilerplate. That’s one of the reasons of building such a library. But there are more!
You possibly deal with collections in your store, and maintaining your store data with large and complex collections of entities might give you a headache, not to mention the boilerplate code it brings to your reducers.
@ngrx/entity is there for the rescue to simplify your reducers and domain models.
Entity State
After setting up your entity adapter, your entity state will look like the following in your store.
interface EntityState<T> {
  ids: string\[\];
  entities: { \[id: string\]: T };
}
There are a couple of reasons for maintaining a dictionary of entities and a list of ids in your entity state:
- In order to keep your collection sorted along with having a dictionary, you need an ordered list. That’s why ids array is part of the entity state.
- Lookup actions are expensive operations most of the times if you maintain your data as a list. Using a dictionary for your entities is much faster compared to searching through an array.
CUD operations (Create, Update, Delete)
Entity adapter brings many useful methods for your CUD needs in the store.
Take a look at the following in-app events example of mine, to see available operations, as well as different use cases with partial changes object.
import * as fromEvents from '../actions/events.action';
import { createEntityAdapter, EntityAdapter, EntityState } from '@ngrx/entity';
import { Event } from '../../models/event.model';

export interface EventsState extends EntityState<EventEntity> {
  loaded: boolean;
  loading: boolean;
  error: Error;
}

export function sortDescByUpdatedDateTime(a: EventEntity, b: EventEntity) {
  return b.data.updatedDateTime - a.data.updatedDateTime;
}

// Note that you can build your custom sort function as above and pass it down
// to your entity adapter to automatically sort ids array based on your sort logic
export const eventEntityAdapter: EntityAdapter<EventEntity> = createEntityAdapter<EventEntity>({
  selectId: (event: EventEntity) => event.data.eventId,
  sortComparer: sortDescByUpdatedDateTime,
});

export const initialState: EventsState = eventEntityAdapter.getInitialState({
  loaded: false,
  loading: false,
  error: null,
});

export interface EventEntity {
  data: Event;
  read: boolean;
}

export function eventsReducer(state = initialState, action: fromEvents.EventsActionsUnion): EventsState {
  switch (action.type) {
    case fromEvents.EventsActionTypes.LoadAllEvents: {
      return {
        ...state,
        error: null,
        loading: true,
      };
    }

    // You can use one of the ...many operations here, based on your business requirements
    // addMany, updateMany and upsertMany are available
    case fromEvents.EventsActionTypes.LoadAllEventsSuccess: {
      return eventEntityAdapter.upsertMany(action.payload, {
        ...state,
        loading: false,
        loaded: true,
      });
    }

    case fromEvents.EventsActionTypes.LoadAllEventsFail: {
      return {
        ...state,
        loading: false,
        error: action.payload,
      };
    }

    case fromEvents.EventsActionTypes.ClearOldEvents: {
      const idsOfexpiredEntities = /* your logic here */;
      return eventEntityAdapter.removeMany(idsOfexpiredEntities, state);
    }

    // Changes object is an object with Partial<T> type of your entity interface
    // You can consider it as an object which will be deep merged to your entity
    case fromEvents.EventsActionTypes.ReadEvent: {
      return eventEntityAdapter.updateOne(
        {
          id: action.eventId,
          changes: {
            read: true,
          },
        },
        state,
      );
    }

    // Note that you need to provide an array of Update<T> to the updateMany operation
    // UpdateStr<T> = {
    //   id: string;
    //   changes: Partial<T>;
    // };
    case fromEvents.EventsActionTypes.ReadAllEvents: {
      return eventEntityAdapter.updateMany(
        [...state.ids].map((eventId: string) => ({
          id: eventId,
          changes: {
            read: true,
          },
        })),
        state,
      );
    }
  }
  return state;
}

export const getEventsLoading = (state: EventsState) => state.loading;
export const getEventsLoaded = (state: EventsState) => state.loaded;
export const getEventsError = (state: EventsState) => state.error;
Entity adapter and some of the CUD operations — reducer
Default Selectors
Your entity adapter instance exports 4 useful selectors for you. You can export them in your selectors file, along with your custom ones if needed.
export const {
  selectIds,
  selectEntities,
  selectAll,
  selectTotal,
} = yourEntityAdapter.getSelectors();
Use ngrx-data if you’ve too many domain models
If you want to take reducing the boilerplate code of your domain models to another level, you might want to take a look at ngrx-data library. It’s not part of official @ngrx/platform just yet, but they announced that it will be soon.
It’s not an alternative for ngrx, but instead it’s an additional flavour for it to extend managing domain models. As it’s stated on their documentation:
Many applications have substantial domain models with 10s or 100s of entity types such as Customer, Order, LineItem, Product, and User.
In plain ngrx, to create, retrieve, update, and delete (CRUD) data for every entity type is an overwhelming task. You’re writing actions, action-creators, reducers, effects, dispatchers, and selectors as well as the HTTP GET, PUT, POST, and DELETE methods for each entity type.
In even a small model, this is a ton of repetitive code to create, maintain, and test.
The ngrx-data library is one way to stay on the ngrx path while radically reducing the “boilerplate” necessary to manage entities with ngrx.
If you haven’t used @ngrx/entity in your NgRx application yet, I strongly advise you to do so. You can read more about it on the following introduction post - Introducing @ngrx/entity.
Use selectors, seriously
A selector is a pure function that slices a part of your state. They’re small query functions that filter out your state object. Other than utilizing selectors inside your view layer, it is additionally conceivable to compose selector functions on other selectors.
You should start using selectors for both compliance with DRY principle and performance concerns. Pure selector functions will help you avoid slicing through the state, every time you need a piece of it, eventually saving you from repeating yourself. For the performance benefits it brings, let’s have a look at the following quote from NgRx selector docs:
Because selectors are pure functions, the last result can be returned when the arguments match without reinvoking your selector function. This can provide performance benefits, particularly with selectors that perform expensive computation. This practice is known as memoization.
— NgRx selector docs
Here’s an example usage of selectors, including composing selectors from different features:
Composing selectors — selector
Take a look at official docs for advanced use cases of selectors, it will definitely help you to solve complex problems in your app: https://github.com/ngrx/platform/blob/master/docs/store/selectors.md
Keep your store clean
A common debate on NgRx store is about which state actually belongs to the store. When I watched Mike Ryan and Brandon’s Reducing the Boilerplate with NgRx talk on youtube, it immediately took place in my head. I was already thinking through this question and evaluating my application’s state without a structure in place which they introduced clearly during the talk.
The structure that they pitched definitely helps on deciding which state belongs to the store or not.
The answer is SHARI! If your state fits in any of the categories below, you should keep it in your store.
Shared
— Shared state is accessed by many components and services
Hydrated
— State that is persisted and hydrated from storage
Available
— State that needs to be available when re-entering routes
Retrieved
— State that needs to be retrieved with a side effect
Impacted
— State that is impacted by actions from other sources
Serialization and hydration
If you’re like me, you probably prefer to persist data for part of your application store — like app settings, in user’s browser storage and hydrate it. This can be done through meta reducers.
Serialization
Just be careful about serialization when you put a data in your store. Your data must be serializable, which means you cannot put your Map() or Set() object instances in the store.
An easy way of checking whether your object is serializable or not is, simply comparing your original object with the output of the following:
JSON.parse(JSON.stringify(obj))
Persistent storage and hydration
I use ngrx-store-localstorage package to persist store data in localStorage. Here’s an example of how it’s done, using a meta reducer:
Persistent storage of your store — reducer
Persistent storage of your store — feature module
By the way, NgRx team has announced that there will be a built-in support for hydration and serialization with the next version — 7. So, looking forward to it!
Follow me on Twitter for more tips like the ones in this post.
Please don’t forget to like and follow if you find this article useful. May the purity be with your functions and components!